
In this Jetserver Web Hosting guide we will explain how to redirect your domain to use the Office 365 mail service.
Step 1 – Creating A TXT Record
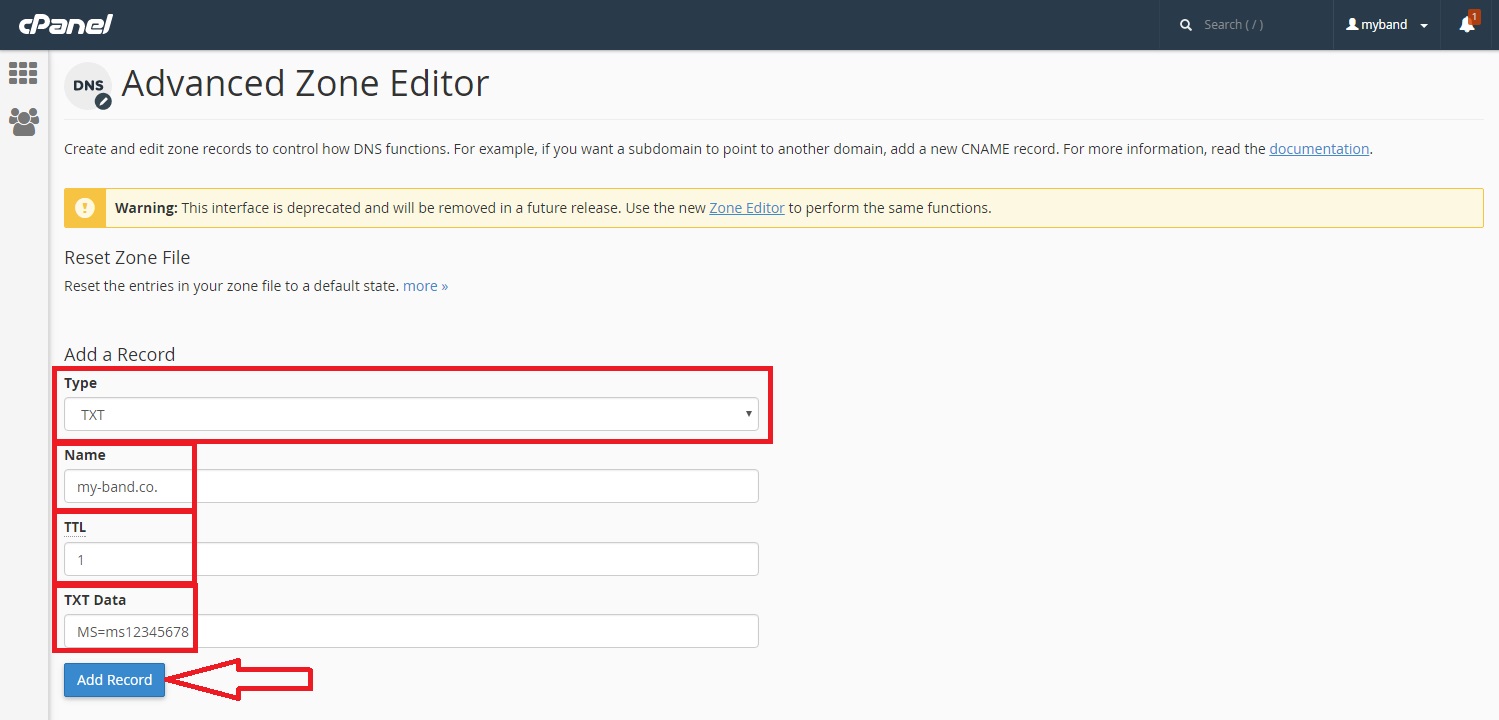
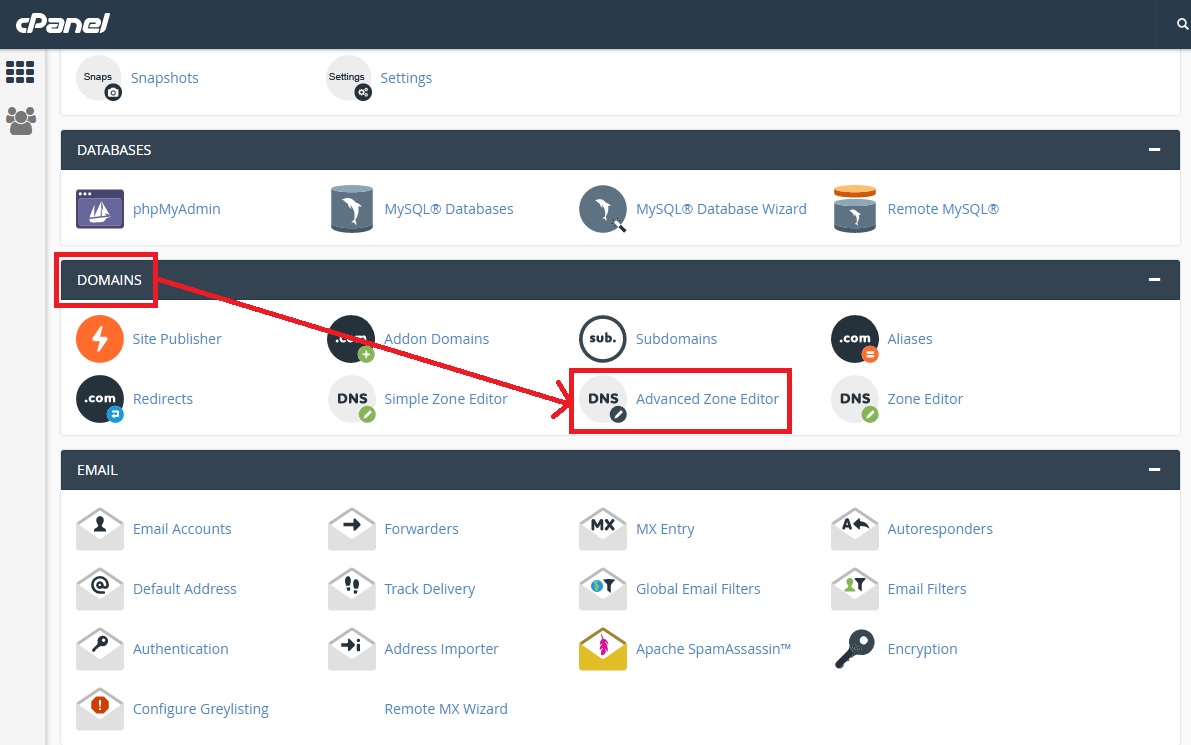
Before we can use Office 365 mail services, we need to create a DNS record that will prove and verify for Office 365 that the domain under which the service will operate, indeed belongs to us. To do this, go to cPanel hosting and under Domains category, click on the Advanced Zone Editor icon:

Domain Redirection for Using Office 365
On the page we receive, wnter the DNS record information as follows and finally click the Add Record button (do not forget to place a point at the end of the domain name!):
Domain Redirection for Using Office 365
At the TXT Data line, instead ot MS=msXXXXXXXX you should provide the actual Destination or the Points to Address provided to you by Office 365.
At this point, you need to wait for a few minutes for the DNS record you created to be updated on the web servers.
Step 2: Domain Confirmation with Office 365
Here, in fact, we ask Office 365 to find the TXT Record we created and confirm the domain to use the Office 365 mail service:
- We open Office 365 and the Domains page we clicke on the domain we want to approve.
- On the Setup page, press the Start Setup button.
- On the Verify domain page, click the Verify button.
Step 3 – Creating an MX Record
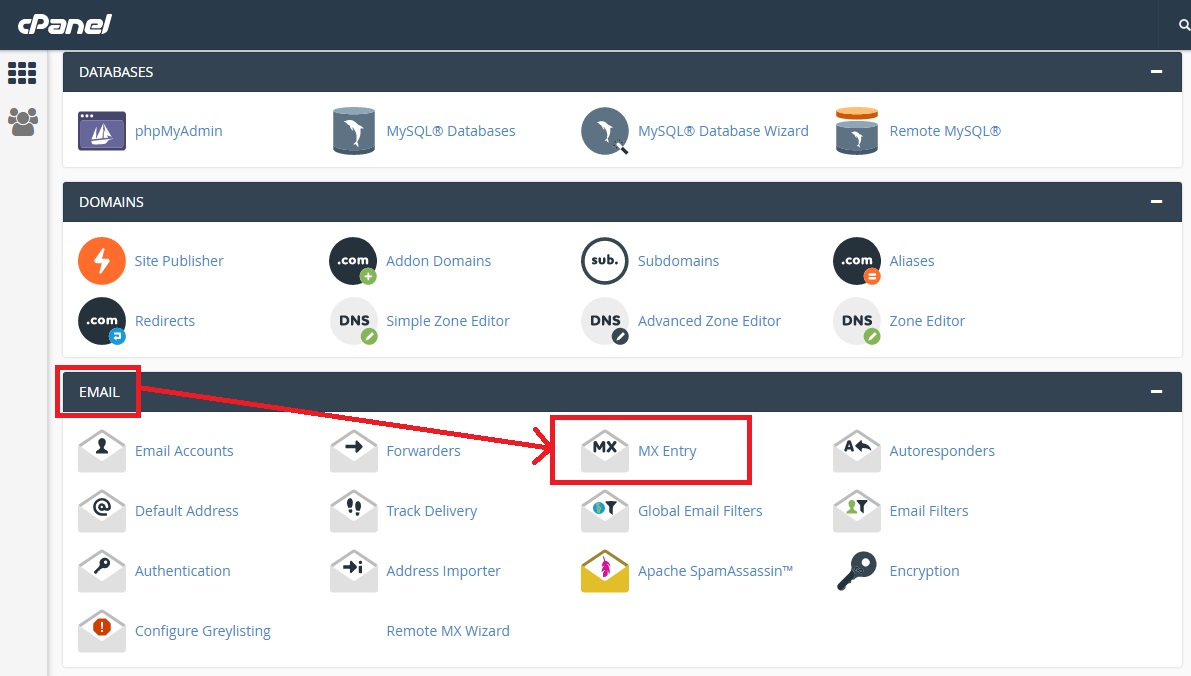
Creating an MX Record will create a situation where emails on the domain extension will reach the Office 365 mail service. In cPanel hosting under the EMAIL category,clicke on the MX Entry Icon:
Domain Redirection for Using Office 365
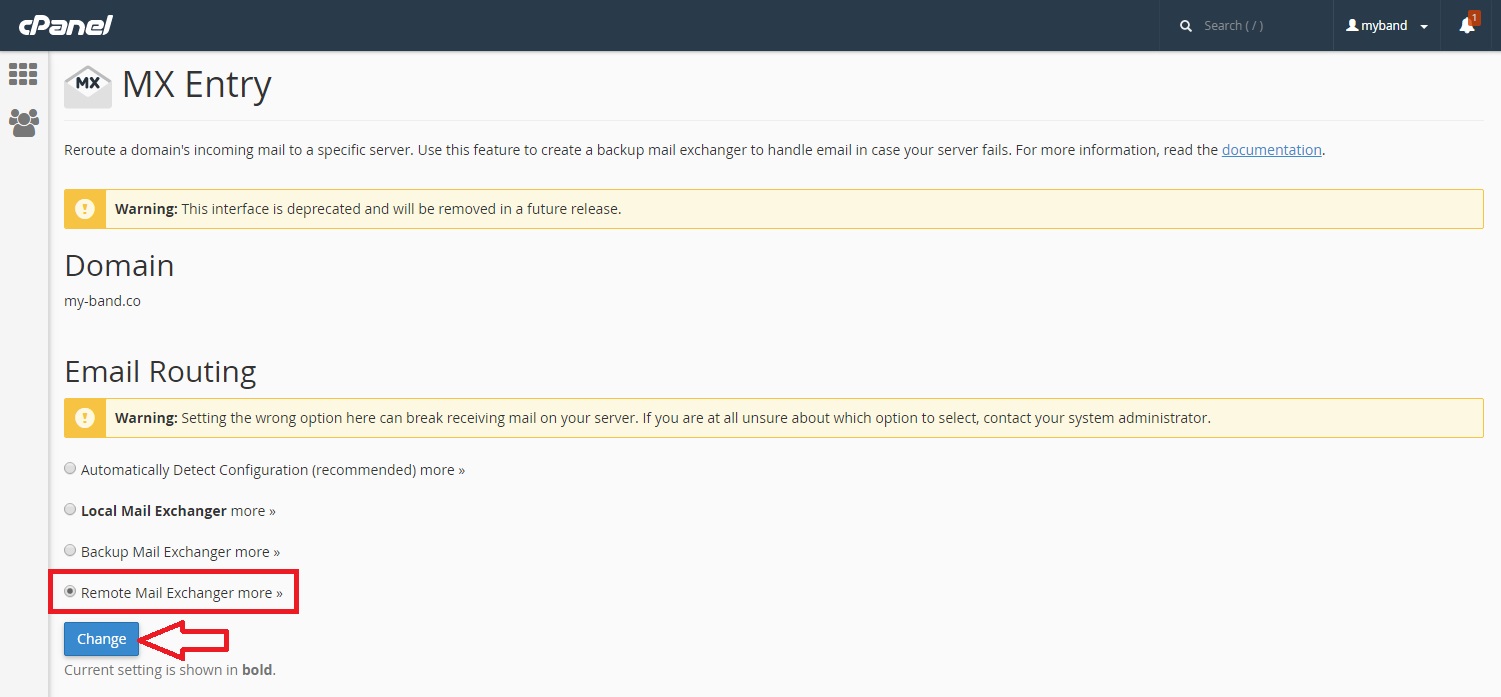
On the resulting page, select the Remote Mail Exchanger and then press the Change button:
Domain Redirection for Using Office 365
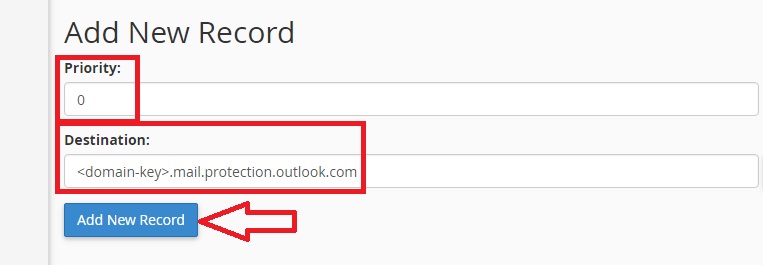
On the same page, under Add New Record, enter the following information and then click the Add New Record button:
Domain Redirection for Using Office 365
For the Destination line, type: .mail.protection.outlook.com (the point before the word ‘mail’).
For your attention:
1. Enter the actual domain key you received from the Office 365 portal account instead of <domain-key>.
2. If other MX records exist, delete them by pressing Remove next to any of the MX records that we have not created just now.
Step 4 – Creating CNAME Records
In the cPanel hosting, go to the Domains category and click on the Advanced Zone Editor icon:
Domain Redirection for Using Office 365
On the page we receive, we’ll add 6 new CNAME records based on the example below:
Domain Redirection for Using Office 365
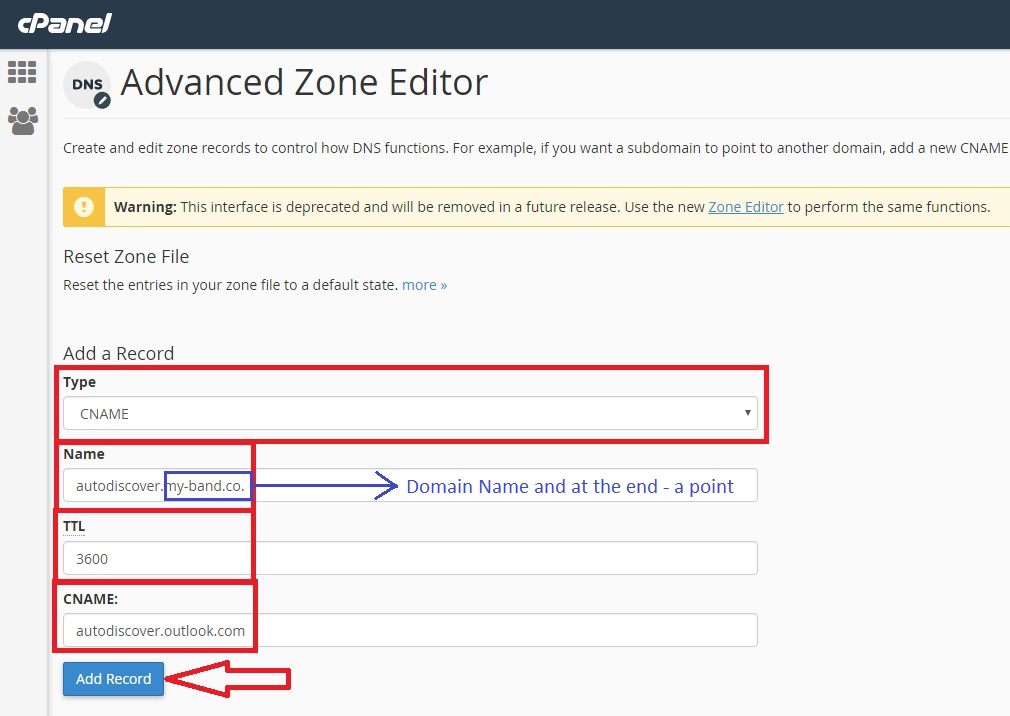
You have 6 CNAME records to create, and instead of domain-name, enter the domain name and end up with a dot, and at the end of each entry, click the Add Record button:
- Name: autodiscover.domain-name. TTL: 3600 Type: CNAME CNAME: autodiscover.outlook.com
- Name: sip.domain-name. TTL: 3600 Type: CNAME CNAME: sipdir.online.lync.com
- Name: lyncdiscover.domain-name. TTL: 3600 Type: CNAME CNAME: webdir.online.lync.com
- Name: msoid.domain-name. TTL: 3600 Type: CNAME CNAME: clientconfig.microsoftonline-p.net
- Name: enterpriseregistration.domain-name. TTL: 3600 Type: CNAME CNAME: enterpriseregistration.windows.net
- Name: enterpriseenrollment.domain-name. TTL: 3600 Type: CNAME CNAME: enterpriseenrollment.manage.microsoft.com
Step 5 – Creating a TXT Record for SPF Spam Prevention
In cPanel hosting, go to the Domains category and click on the Advanced Zone Editor icon:
Domain Redirection for Using Office 365
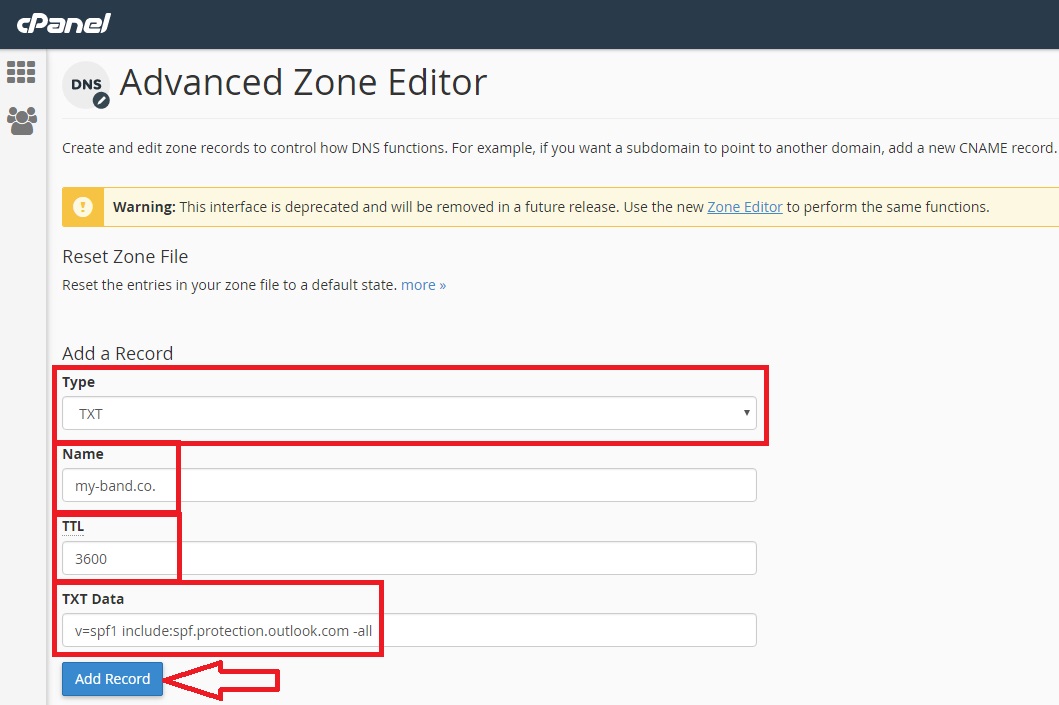
We will create a new TXT Record according to the following description and finally press the Add Record button:
Domain Redirection for Using Office 365
In the row Name we will enter the domain name and end up with a point.
In the line TXT Data we will enter: v=spf1 include:spf.protection.outlook.com -all
Step 6 – Creating 2 Required SRV Records for Office 365
In cPanel hosting, go to the Domains category and click on the Advanced Zone Editor icon:
Domain Redirection for Using Office 365
On the page received, we will type 2 entries in the SRV according to the following example:
Domain Redirection for Using Office 365
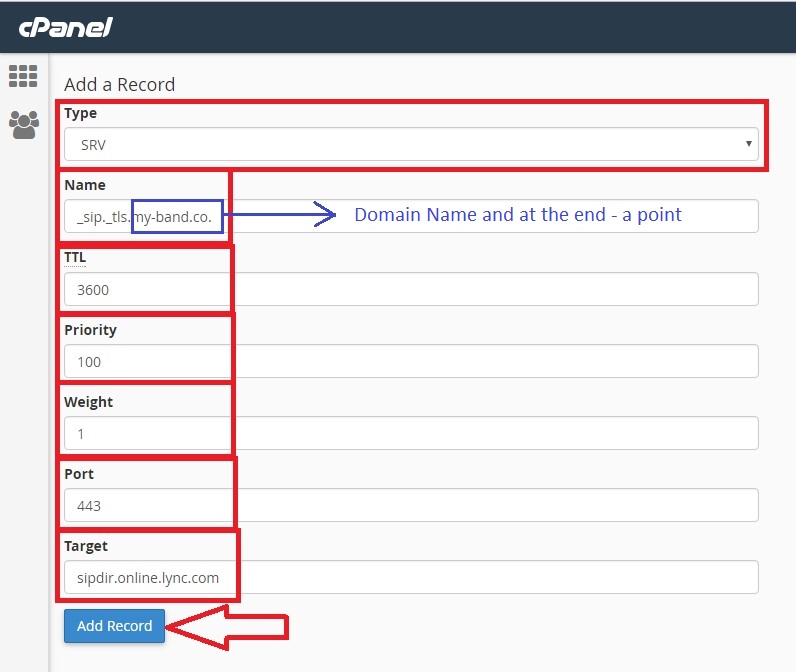
At your disposal are 2 SRV records to be created, where instead of domain name, enter the domain name and end up with a point and at the end of each entry click the Add Record button:
- Name: _sip._tls.domain-name. TTL: 3600 Type: SRV Priority: 100 Weight: 1 Port: 443 Target: sipdir.online.lync.com
- Name: _sipfederationtls._tcp.domain-name. TTL: 3600 Type: SRV Priority: 100 Weight: 1 Port: 5061 Target: sipfed.online.lync.com